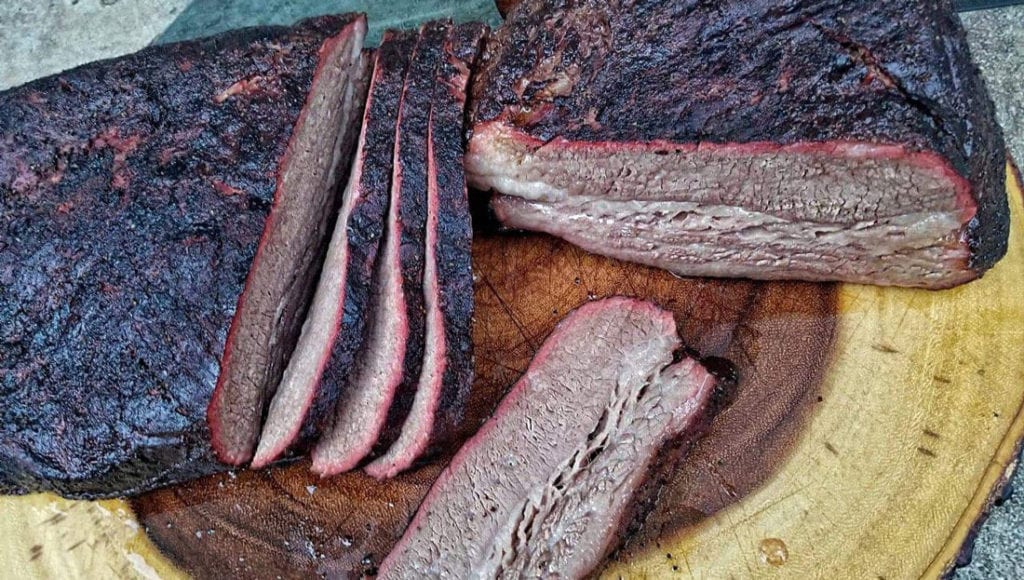
There is one cut of meat that comes to mind when I think of intimidating cuts. For the amateur barbecue enthusiast this cut is a tough working muscle that when prepared wrong will give your jaw a workout worthy of a gym membership. But when prepared right it can be the most rewarding culinary experience of your life.
This cut I’m talking about is the king of central Texas and is known as brisket. Thanks to the popularity of modern barbecue this cut has seen dramatic price increases and can be ever elusive in states where barbecue isn’t king. As said prior this is a working muscle coming from the chest of beef cattle and with that being said this cut is full of tough to break down connective tissue.
In this article I intend to help the amateur cook identify a brisket along with an explanation of grading and what is best for you to work with at home. I will also explain trimming, seasoning and how to cook this infamous cut of beef so that your not left with a chewy hunk of leather that the dog would even be afraid to eat.
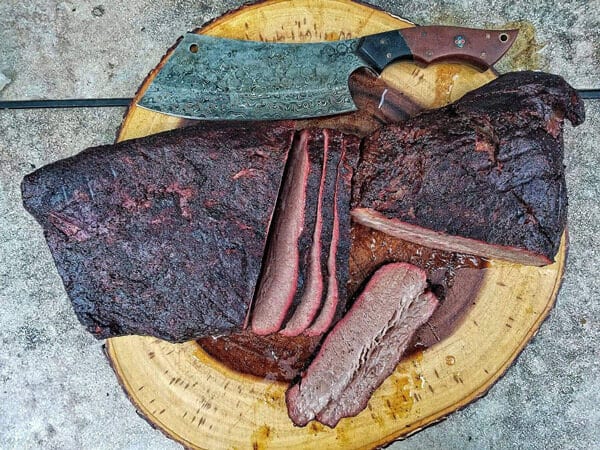
As intimidating as the cook process is it can be equally as daunting just trying to select the right Brisket. Choice, Select, Prime, Natural, Grass fed, or Organic What does it all mean? Well to make it a little easier we have to understand the USDA grades and wording they use. There are eight quality beef grades. The grades are based on two main criteria: the degree of marbling (intramuscular fat) in the beef, and the maturity (estimated age of the animal at slaughter).
Now that we know the grading difference we should focus our attention on the first three. Prime is generally reserved for competition cooks and it can get extremely expensive. This is especially true for general supermarkets if Prime can even be found. Luckily if your fortunate enough to have a Costco nearby then you could be in luck as they often have very reasonable prices on USDA prime beef.
Now for the majority of us it’s looking like choice grade will be the easiest to find and what most home cooks are working with and can be found at local supermarkets. This may require you to talk to the meat department to find a whole brisket packer and for those that don’t know a whole brisket is usually cryovac sealed and includes two parts held together by a fat seam and we call this entire primal cut a packer.
The two pieces of the brisket are known as the flat and the point. The flat is your leanest and thinnest part of the brisket while the point is the fattier and larger section of the brisket. Now as for Select grade as you can see in the description above it doesn’t have as much fat so it’ll have a lower marbling score. Select will still produce a tasty brisket but due to it being leaner your generally left with a slightly tougher and drier product.
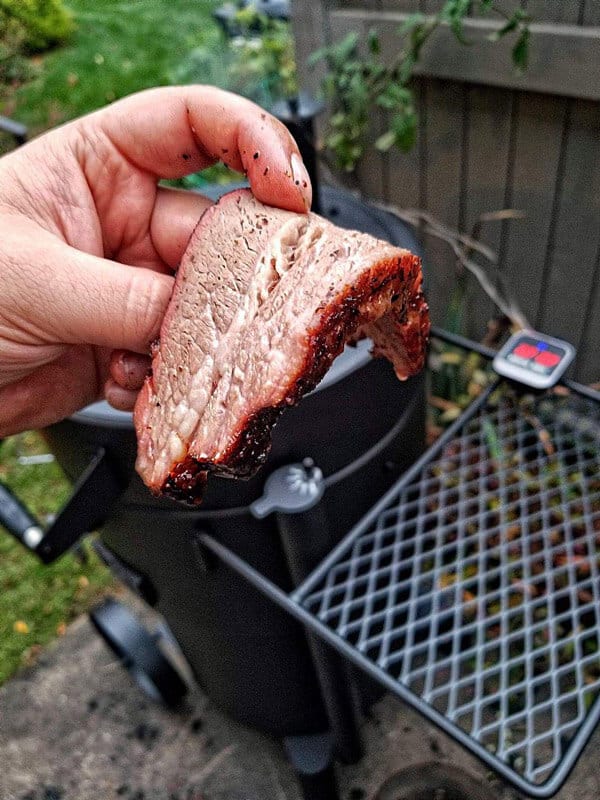
Now that we have grading out of the way let’s talk about a few other words you may see. The phrase “Grass fed” is thrown around from time to time and that is literally all based on the cattle’s diet. Most cattle are generally grass fed initially however during the last few months the cattle is moved to a feed yard where its finished with a balanced diet of corn, beets, potato hulls and other foliage or hay.
A Grass fed cattle however is fed a diet of grass and foliage its entire life including the feed yard. Grass fed beef tends to be leaner due to the diet and can be more difficult to get tender unlike a corn finished brisket. Two other phrases you may look for are Natural or Organic. Both of these are in reference to using no hormones or antibiotics in the cattle or feed and Organic takes this a step further by ensuring the feed is organic and the feed yard is only using organic feed as well.
A Grass fed cattle however is fed a diet of grass and foliage its entire life including the feed yard. Grass fed beef tends to be leaner due to the diet and can be more difficult to get tender unlike a corn finished brisket. Two other phrases you may look for are Natural or Organic. Both of these are in reference to using no hormones or antibiotics in the cattle or feed and Organic takes this a step further by ensuring the feed is organic and the feed yard is only using organic feed as well.
Most of the briskets I purchase are of choice grade if I’m cooking for friends and family. I purchase whole packers and always buy enough so that I can vacuum seal and freeze leftovers. You are going to want to take note that there is a significant amount of moisture loss which will cause a considerable amount of shrinkage. A 14lb packer will generally yield 7-8lbs of finished product after trim and cooking.
Trimming is a vital part of any brisket because it affects the entire cooking process. Does your Brisket have too much fat on top? If you do you won’t get a good bark or enough smoke penetration in your meat. If you have pieces of the flat that are too thin or too thick you’ll have uneven cooking and you’ll end up with dry spots or burnt edges.
If you have dangling pieces of meat or fat leftover from the butchering process you’ll end up with crisp and charred chunks that you’re just going to have to throw out anyways. How you trim your brisket ultimately affects how it cooks and ultimately how well it is sliced and served.
Don’t stress yourself out about it too much though! If you trim a little too much or not enough, guess what? Your brisket will turn out just fine. Just take notes and try again.
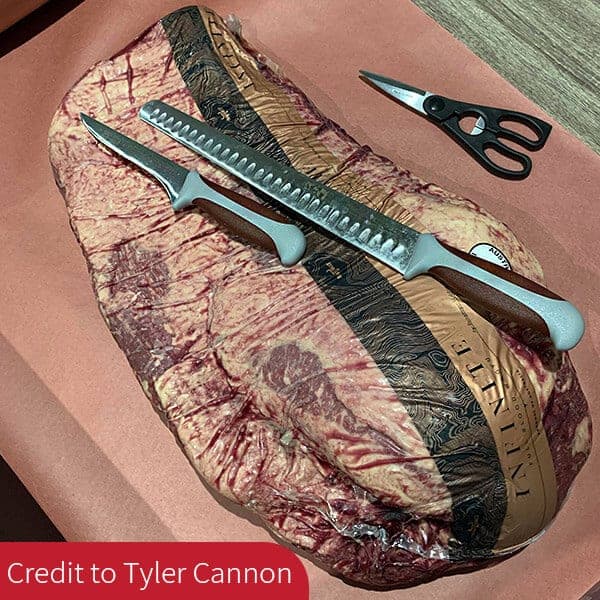
I didn’t trim the perfect brisket my first time and you probably won’t either. Brisket is a cut that requires a lot of practice and patience, but there is always the reward of amazing tasting meat at the end.
So now that I got you second guessing your purchase or maybe nervous that your friends are going to be served up a hacked up piece of shoe leather lets jump right into opening your packer. As stated before your brisket will come vacuum sealed and once opened you’ll notice two sides to this huge chunk of beef. One side will look like straight fat and that’s called the fat cap. Flip the meat over and you’ll see mostly exposed meat, some silver skin, and a large clump of fat from the point side.
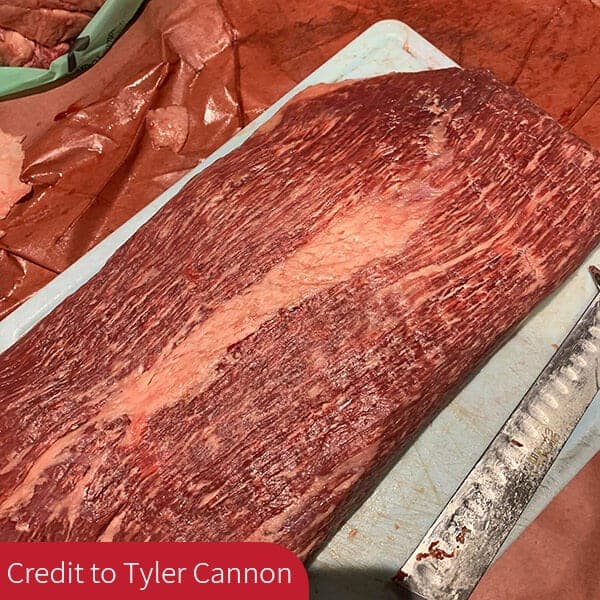
The long, thin, rectangular side of the brisket is your flat. The fatter, muscly, non uniform end of the brisket is your point. Now that your familiar with the structure let’s get to trimming. Your going to want to grab a really sharp blade. I actually prefer a curved blade fillet knife for this task.
Start by squaring up the sides and cutting anything hanging. You should also round your corners a bit so that the corners don’t burn. Next on the side opposite of the fat cap side you’ll want to remove the thin silver skin and any fat on this side. As for the point side you’ll have a hard knot of fat. You wont be able to cut it all out but you’ll want to get it so that area is level with the rest of the point.
Next inspect the direction of the grain and notice it’s at a slight angle to cut against the grain when slicing. I like to cut off a small piece at the very tip of the flat showing the direction I want to cut my slices when its complete. I do this because it can be really hard to identify the direction of the grain when your pulling out this brisket from the smoker and it looks like a deep space meteorite.
Now you’ll want to flip your brisket over and take a look at your fat cap. Take down your fat cap to 1/4-1/2 inch of fat and keeping it as level as possible. I like to get down eye level with the brisket to inspect what I want to take off. You can see the softer fat you want to keep this way. Take a look at a couple before and after photos here to get a good idea. Now that your all trimmed up it’s time to season and get to your smoker.
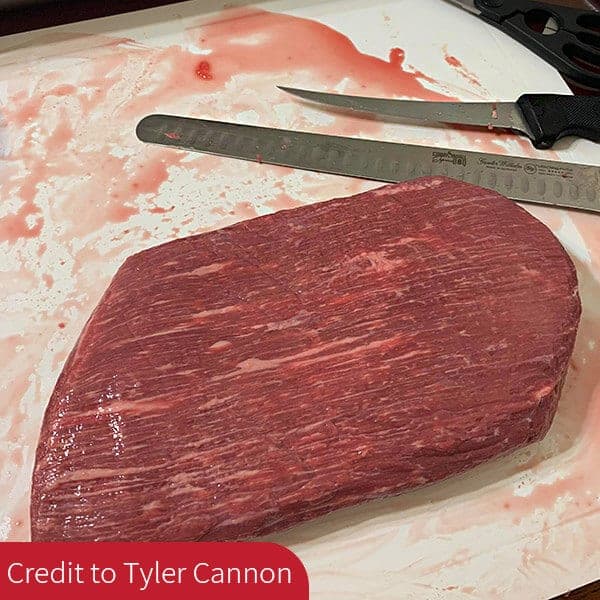
I bet your thinking at this point that your going to need some fancy bottled Texas rub for this next step and we certainly have a few favorites or can even recommend Dom’s Magic Dust from our Joseph-Que Craft Rubs but to be really honest you don’t even need any of these to make a tasty brisket.
In fact if you talk to Aaron Franklin from America’s biggest BBQ destination Franklin BBQ you’ll see that all he uses is a 50/50 ratio of Kosher Salt and ground Black Pepper. If you have a shaker bottle you can use this to assist in evenly coating your brisket. I like to get and even shake going about 6 inches above the brisket.
Don’t be afraid to be generous with the seasoning either as this is a large cut of meat. See examples in the pictures to get an idea of a good amount to use.
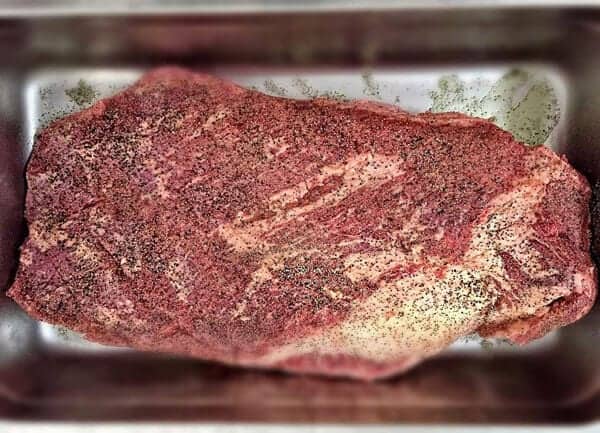
Now that we’ve got our brisket seasoned let’s get ready to smoke. This part of the process yields the most controversy. What pit temp do I cook at? Do I wrap? Do I use paper or foil? Fat side up or down? To me this is the fun part and I’ve achieved very tasty and probe tender briskets using almost every method of controversy.
I will do my best to cover each part and allow you to make your own judgment call based on your cooking style and vessel your cooking in.
I’m sure we’ve all heard of the 13-15hr long smoke story and for most of us this is the traditional method and what most of you will probably be doing. Yes you’ll be getting up at 2am to start your fire and you’ll be getting that pit into the 225° range. This process is long and will have you second guessing yourself about half way through when you hit the infamous stall and speaking of the stall I guess this is a proper time to explain this phenomenon.
The stall is a process in which your brisket will hold its internal temperature for what seems like forever. This usually happens around 160-165° and the reason for this is due to evaporative cooling. Similar to what your body does when your working out at the gym. Your body sweats to cool itself down.
The moisture in your brisket is doing exactly that. Its sweating and cooling and just not allowing that temp to rise. So how does one break the stall? Well it’s simple you can choose to wait and experience a crust like no other or you can do what the rest of us do and that is wrap it.
Wrapping your brisket is a whole other controversy all in itself. Some folks say no wrap at all if you want bark. Others say wrap in foil to protect your juices and I. Well I prefer another method. This method is widely accepted as one of the best and is extremely popular and that is to wrap your brisket with butcher paper. Butcher paper is the best of both worlds in my opinion.
The paper retains moisture but also allows your brisket to breathe. Allowing it to breathe will help form that bark your looking for without drying the brisket out. Now I also feel its important to add a little moisture to your wrap as well. You can be as simple as adding a little water to your wrap or as complicated as I am by mixing equal parts of soy sauce and beef broth then add a few dashes of Worcestershire to the mix. It’s all up to you but adding moisture at this point is key to keeping your brisket from drying out and heck its gives you another opportunity to add a little flavor too.
At this point you must be thinking when is this huge piece of meat going to be done already? Well the answer to this is simple. It’s done when it’s done. You must be thinking wait what? He doesn’t have a magical time? Well, in short, no. The reason for this is Brisket is a Primal cut, it’s a huge cut, and its connective tissue is tough as nails.
You can have two identical weight briskets and cook them both in the same cooker and can totally have one finish an hour before the other. So do to this we cook to internal temp, look, and general feel. The magic done time typical happens around 195-205° internal in the fattest part of the flat.
Also check with your probe. If your brisket doesn’t probe like butter its simply not done yet. The biggest mistake people make is pulling too early because they have waiting guests. If your worried about having your brisket completed in time for guests then plan to cook earlier then you would. It’s actually pretty easy to keep your brisket warm for several hours after the cook rather then rushing to pull a tough muscle.
Now I mentioned that 225° was the cooking temp in which most of you will probably be cooking at however I like to move things along and actually like to cook my briskets anywhere from 275-300°. This will significantly shorten your cook time and will also help power through your stall while not sacrificing bark, flavor, or texture. But this decision is up to you and the type of rig you use maybe a factor in the cooking temp you use.
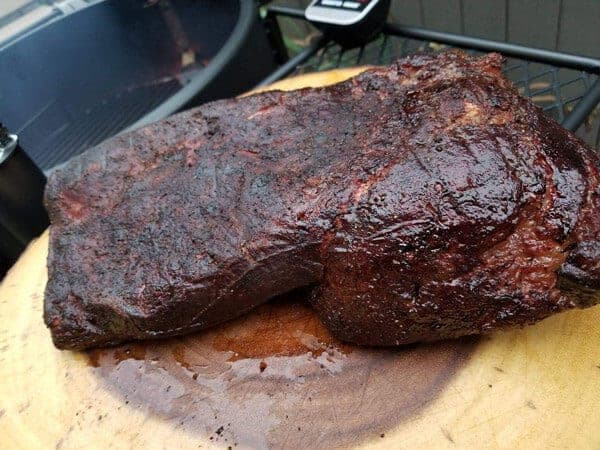
The age old question and a question that has caused more internet quarrels around the globe then probably any other brisket question ever. Every pit master has his or her own opinion and I have my own as well. Some believe if the fat cap is up that it will baste your meat while it cooks while others say you’ll sacrifice bark because when the fat renders it’ll wash away your rub.
Now to be honest I’m not sure if I believe either of those theories but there is one thing I do know and that’s that fat is a great insulator. Fat will protect your meat from the heat. With this being said I am a firm believer you should face your cap to the heat source. This means you offset smokers should place your fat cap up. While vertical smokers should place the fat cap down. Now is a deal breaker if you don’t follow these Instructions? Nope not at all you will always have smoked meat in the end.
Alright your brisket has reached 203° internal and its probing like butter. Now what do I do? If you thought you could run to the cutting board and start slicing well your wrong. This part is critical to getting that waterfall brisket that your hoping to get. At this point you want to rest your brisket as it is still cooking.
Connective tissue is still breaking down, fat is still rendering, and moisture is contracting back into the muscle as the brisket begins to cool. You can leave it on your cutting board wrapped if you plan on eating it soon or you can further wrap your brisket in towels and throw it in a cooler till your guest are ready. Whatever you do don’t skip this crucial process.
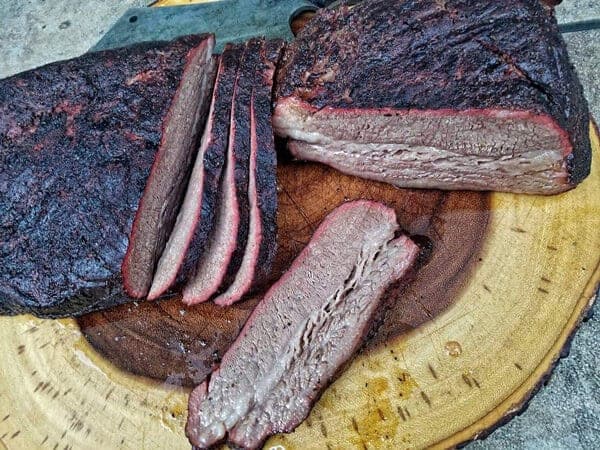
Next we get into slicing your brisket and if you followed my advice earlier it should be pretty easy to identify the direction the grain of the meat is running since you made a slice at the corner tip of your brisket showing the exact against the grain cut. I like to use a slicing knife with a granton edge and I slice about 1/4″ thick slices and slice till you get just past mid way which should take you to the point. Take the point and turn it 90° and slice. You now have a wonderful brisket.
Through the process I make sure to take notes of the cook. What seasoning I used, what temps, and size of protein. You’ll notice that your briskets will all vary slightly and that’s the fun of the cook. I certainly hope that after reading through these tips that you can take your first brisket and feel at ease that you have the tools and knowledge to turn out a product that your friends and family will be talking about for years to come.
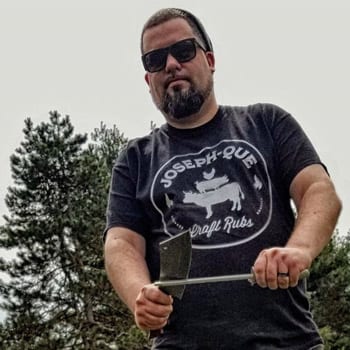
This article written by one of our talented admins, Jacob Parmentier.
Jacob owns a seasoning brand named “Joseph-Que”
You can check it here >>
And enjoy a special discount code for our readers “artofsmoke”.
Recipe by Pitmaster Shane Hauck Smoked Pork Center cut Loin (watermelon tea/fennel brine) Prep: 24 hours+ Cook: 2 hours, 30 minutes Ingredients: 2-3 lb pork
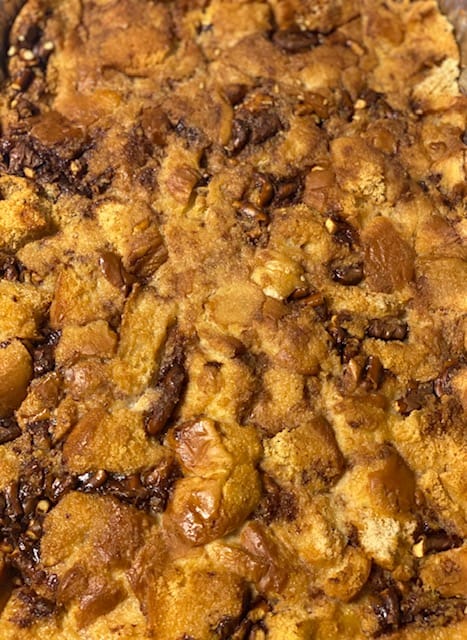
Recipe by Pitmaster Shane Hauck Smoked Chocolate Covered Pretzel Bread Pudding Prep: 2 hours Cook: 1 hour Yield: 13×9 tray Ingredients: 3 cups milk 3
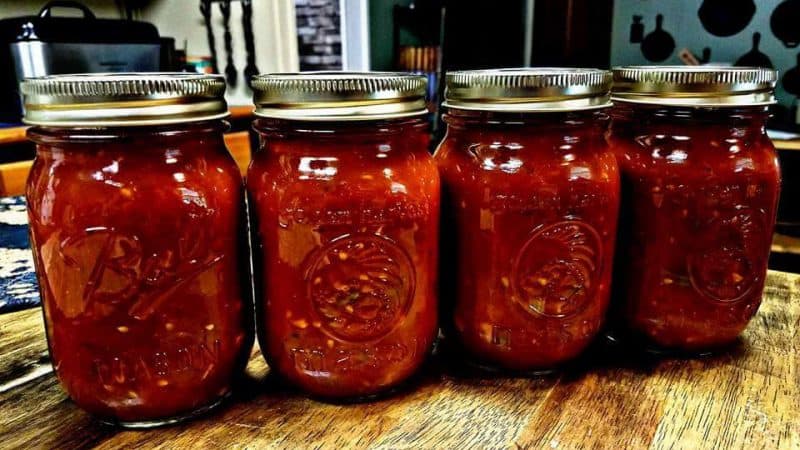
Smoked Salsa Cooking Method: Slow Cooker Cooking Time: 2 h to 3 h INGREDIENTS 8 Medium tomatoes, cut in half and core removed 2 ½
© 2022 Artisan Smoker
One Response
Great and interesting read. Thanks for the tips, I hope to smoke my first brisket soon. I need to finish this battle I’m having with throat cancer and hopefully get back to working again so I can afford a nice brisket. Thanks again and I’m always willing to learn the tips and techniques of smoking.